Wednesday, 10 April 2013

Spread Your Wings Card

Hi Bloggers,
Today I’d like to share a leaving card that I made for a colleague at work.
I chose a Kraft card for the background that had a grid pattern on it. Then I stamped a honeycomb pattern randomly in two opposite corners.
I used a Fran-tage Embossing Enamel to create the molten gold effect – my current obsession!!!
The large mat is cut at 7” using the Cricut Elegant Edges cartridge and I used the same Fran-tage Embossing Enamel around the edges.
The cogs were cut at 2” from the Cricut Paper Lace 2 cartridge. I covered one with Distress Embossing Powder (love the texture!) and the other with the Fran-tage Embossing Enamel sprinkled with Fran-tage Glass Glitter in Champagne. As the enamel melts, the glitter becomes embedded and the enamel acts as glue – it’s gorgeous!
The main image is made using 3 stamps. First, I stamped the dress. Then I masked it and stamped both the wings.
I used Promarkers to colour the image and sprinkled Fran-tage Embossing Enamel on the skirt.
The text is made using tiny letter stamps.
Hope you like it.
Thanks for stopping by.
Pam xx  

Tuesday, 9 April 2013

Wedding Invitations

Hi Bloggers,
I think it’s safe to say I’ve been somewhat busy these last few months!! I’ve been making projects that I cannot share on my blog.
However, today I can share the wedding invitations that I made for my ex-boss. The design is based on the “Autumn Engagement Card” that I made for her. I scaled the design to 6”x6” and changed the image of the couple.
I made 50 invitations and, because of some of the intricacies, I spent close to 200 hours making them.
From this:
To this:
Here's a close up of the rolled flowers:
The background patterned paper is from Bo Bunny and the plain card is Bazzill.
I used the following Cricut cartridges: Flower Shoppe, Sweethearts, Wedding and Gypsy Font.
I also used a couple of Martha Stewart punches, Distress Ink and a Swiss Dots embossing folder.

Thanks for looking.
Pam xx

Monday, 29 October 2012

Autumn Engagement Card

Hi Bloggers,

Today I'd like to share an 8" x 8" engagement card I made.

I made the flowers using the patterned paper and the Flower Shoppe cartridge, inking the edges slightly. The leaves are also from the Flower Shoppe cartridge.


The large scallop heart and the engagement couple are from the Sweethearts cartridge. I embossed the cream heart with the Swiss Dots embossing folder and added a little ink to the edges.

I used a Martha Stewart punch to make border strips from cream and brown card, layering them.

I used my Gypsy to weld the letters from the Gypsy Font cartridge and added ribbon to the border strip.

Hope you like it.
Thanks for stopping by.
Pam xx

Sunday, 28 October 2012

Cat Frame Birthday Card

Hi Bloggers,

Today I'd like to share a 6" x 6" card that I made with the Cindy Loo and Flower Shoppe Cricut cartridges.

It's very dimensional with some distressed edges for added texture.

Here's a close up of the cat.

The rolled flowers and leaves are on the Flower Shoppe cartridge.

I embossed the frame using the Swiss Dots embossing folder and my Bigshot.

I punched a border strip using a Martha Stewart punch and attached ribbon to the edge.
The font is from the Cricut Craft Room Basics cartridge.

Hope you like it.
Thanks for stopping by.
Pam xx

Saturday, 27 October 2012

3-D Doily Birthday card

Hi Bloggers,

Today I'd like to share an 8" x 8" card that I made for a 30th birthday.
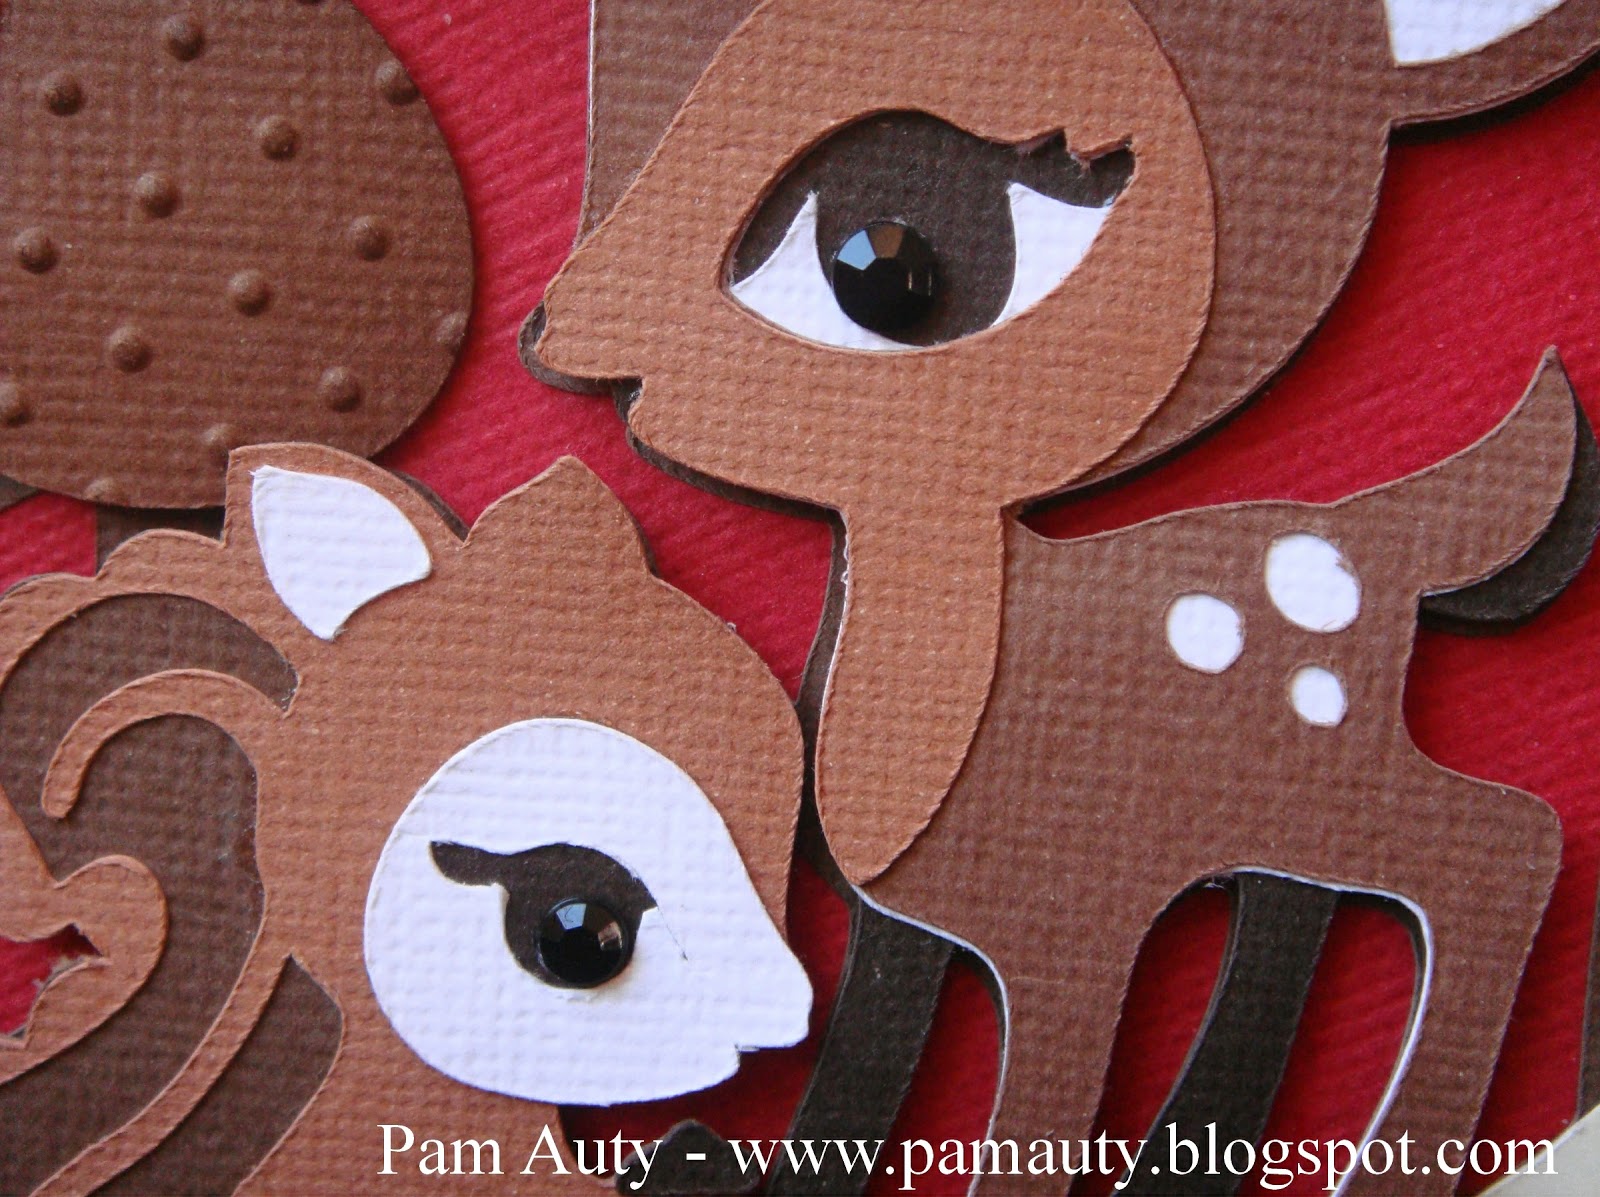
The main image is a doily from the Cindy Loo Cricut cartridge, but rather than just leaving it as a flat image, I've made it 3-D.
I was inspired by a similar idea some time ago (but now cannot remember where it was!) and have only just had chance to try it - so here it is...

I wanted to use autumnal colours as it's an October birthday and chose browns and red.
I used four shades of brown, some red, white and cream cardstock along with patterened paper.

I used my Gypsy to design the card and, as the Cindy Loo cartridge has separate (layered) images for the deer, squirrel and trees, it was easy to make them 3-D. I cut two doilies, one from very dark brown card and the other from cream. I cut (by hand) the centre from the cream doily to create a frame. The brown one was for the base.

I used gems for the eyes.
 

I used embossing folders to add texture to the trees and then layered them, adding gems as a finishing touch.

I chose swirl, dotty and bark designs of embossing folders.

The font is Cricut Craft Room Basics cut at 1/2"

I hope you like it.
Thanks for stopping by.
Pam xx

Saturday, 6 October 2012

Published Layouts Part 3 (of 3)

Hi Bloggers,

Today I'd like to share my third (and final) layout published in Scrapbook Magazine issue 67 (on sale 4th October).

(My first and second layouts are featured on my last 2 blog posts).

Let It Snow:

I used bubble wrap to "stamp" a random pattern on the background paper using brown ink. I like the way this reminded me of snowballs - just like the one on the photo!

I tore the white and brown spotty paper to make snow mounds and made a snowman by drawing around 3 different size circles (overlapping them) - I drew around glasses and plastic tubs.
I cut a strip from the patterned paper for the snowman's scarf.

I cut narrow strips, approx 3/8" wide and used a 4-row weave pattern to create the woven background circle - I used a plate with a 9 1/2" diameter as a template for the circle shape.

I used plates again to create the circle frame for the outside edge of the woven circle. Then I used the alphabet stamps to stamp the title repeatedly around it.
I journaled on tags cut from the reverse side of the paper pack header sheet (an extra bonus in the paper pack) and added wellies cut from the patterned paper. then I tucked them behind the woven circle to create hidden journaling.

I also had a lovely surprise when I looked at the sketch page in the magazine - the sketch for this layout was there!

Hope you like my layouts.
Thanks for stopping by.
Pam xx

Friday, 5 October 2012

Published Layouts Part 2 (of 3)

Hi Bloggers,

Today I want to share with you the second of my layouts published in Scrapbook Magazine issue 67 (on sale 4th October).

(I posted details of my first layout yesterday).

The Chapman Family:

I used lots of distressing on this layout.

I made a pleated photo mat with a scallop edge. I used 5p coins in repeat to make the scallops - I found it easier to do one strip and then use it as a template rather than lining up the coins over and over.

I drew around scallop pastry cutters (on the back of patterned paper), to make the flowers, using varying sizes for the layers. I hand drew a basic leaf shape and used it as a template for 3 leaves then I crumpled up all the flowers and leaves to distress them.

I journaled on strips of paper with the alphabet stamps and also journaled by hand on a long narrow border strip.

I made the title banner by cutting a 12" x 1" strip from patterned paper, cutting a "v" shape in each end (to mimic ribbon ends), and folding 3 pleats into each end.

Hope you like it.
I'll share my third layout with you tomorrow.
Thanks for stopping by.
Pam xx