Showing posts with label Martha Stewart punches. Show all posts

Thursday, 26 November 2015

Pink Pram Best Wishes Card

Hi bloggers,

 I have another baby card to share with you today.
The pink frame is cut with my Cricut using the Elegant Edges cartridge. Instead of discarding the centre piece I embossed it with the Swiss Dots embossing folder.
The pram is from the Everyday Paper Dolls cartridge and I used a Martha Stewart edge punch for the lace.
The tag is from the Wrap It Up cartridge.
Thanks for stopping by.
Pam xx


Friday, 20 November 2015

Good Luck “Maternity Leave” Card 1


Hi bloggers,
 
A colleague went on maternity leave recently and I made this card for her.
I used the “Cherish” Martha Stewart punch around the page for the mat, layering a square in the centre that I embossed using the Swiss Dots embossing folder (one of my all time favourites).
 
The pregnant lady was cut on my Cricut using the New Arrivals cartridge. I cut a triangle from the body and layered a scan photo behind it.
 
I used Martha Stewart punches for the flower and leaves. 
 
Thanks for stopping by.
I hope you like my card.
Pam xx

Sunday, 26 April 2015

Thank You card using Stampin’ Up! “Because I Care” stamp set

Hi bloggers,

I recently acquired the Stampin’ Up! “Because I Care” stamp set and absolutely adore the hydrangea stamp.

There are so many techniques I want to use with this stamp!

For this card I stamped the main design first and then covered it with individual flower heads to create a 3D effect.


I hope you like my card.
Thanks for stopping by.
Pam xx

Sunday, 19 April 2015

Flowers and Butterflies Happy Birthday Card

Hi bloggers,

Today I’d like to share with you a Happy Birthday card.


I dusted down an old PSX stamp and coloured it using Promarkers.

Then I stamped the image again and cut out the butterflies. I coloured them as before and adhered only the body section, lifting the wings to create a 3D effect.

I made a bow from raffia ribbon and attached a button to the centre.
I used a Martha Stewart “punch around the page” set to make the mat and inked the edges with Distress Ink.


I hope you like my card.

Thanks for stopping by.
Pam xx


Sunday, 5 April 2015

Happy Easter Card

Hi bloggers,
Happy Easter!

Today I’d like to share a quick and easy Happy Easter card.
The text and eggs are Serendipity stamps and I coloured the eggs with Promarkers. I also used Martha Stewart "punch around the page" punches and Distress ink.
I hope you like my card.
Thanks for stopping by.
Pam xx
 

Wednesday, 18 March 2015

Spring Thank You Card

Hi bloggers,
 
Today I’d like to share with you an 8 x 8 inch 'thank you' card I made for some dear friends.

I wanted the frame to look nest-like so I started by drawing a 6” circle using a faux stitching pattern and brown pen. To create the twigs I hand stamped the ‘bird and branch’ stamp onto a piece of the background paper (several times) and cut around the branches. I also cut out one of the birds to use as an embellishment.

 
The flowers are all cut using my Cricut and the Art Philosophy cartridge, ranging in size from ¼
inch to 1 ¼ inch. I have stamped the stamen using a Martha Stewart ‘stamp and punch’ set with Broken China distress ink. I also used the same ink on the edges of the flowers.
The Thank You text is also cut with my Cricut (at 3 inch) using the Paper Lace 2 cartridge and the butterflies are a Martha Stewart punch.


I hope you like my card.
 
Thanks for stopping by,
Pam xx
 

Thursday, 5 June 2014

Summer Fun Mini Book


Hi Bloggers,

Today I’d like to share with you an 8” x 8” mini-book I made to celebrate the fun my son had last summer.
 
The outside cover has a layer of crackle paint and I used Tim Holtz Distress Embossing Powder on the title (chipboard) letters.
 
I used scallops (mainly cut with my Cricut) and Martha Stewart punches throughout the book. On these first two pages I have also used stamps and rub-ons:


The second set of pages show how much my son loved driving the tractor and I used my Cricut machine to cut a tractor, which I then covered with Glossy Accents. I also threaded ribbon through the punched edges and highlighted the pages with liquid pearls.

 
On the third set of pages I used the punches to make a border strip and my Cricut to cut the boy, dog and bones silhouettes. I used bone shapes to make flower embellishments.

 
The wine bottles and glasses on the next set of pages are stamped images and the quad bike is cut with my Cricut. All have a coating of Glossy Accents.


I made a pocket on the final set of pages and tucked a tag inside. My son drew the picture on the right hand page. 

 
Hope you like my mini book.
Thanks for stopping by,
Pam xx
 

Wednesday, 17 April 2013

Stamped Elegant Lady Card

Hi Bloggers,
Today I’d like to show you a card I made using the gorgeous “Elizabeth Bennet” stamp by IndigoBlu.
I started off by randomly stamping Honeycomb and Crackleglaze background onto the base card (6” square). Then I added Fran-tage glitter glass in black to the edges. This glitter glass is STUNNING!! The glitter chunks are quite large and add so much texture.
Then I cut a 5.25” mat from white card, using the Cricut Elegant Edges cartridge (I also cut the matching shadow from black card). I stamped the “Elizabeth Bennet” image onto the centre of the white mat and coloured the flowers, butterfly, bird and leaves with Promarkers.
The tag is cut from white card using the Cricut Wrap It Up cartridge and stamped with a greeting from a Personal Impressions set. I added Fran-tage glitter glass around the edges.
The flower is from the Cricut Flower Shoppe cartridge and the branches are a Martha Stewart punch (I really must stop using these on all my projects!!).
I tried to take some of the photographs in sunlight in the hope that it would better show the effect of the glitter glass.
Thanks for stopping by.
Pam xx

Tuesday, 9 April 2013

Wedding Invitations

Hi Bloggers,
I think it’s safe to say I’ve been somewhat busy these last few months!! I’ve been making projects that I cannot share on my blog.
However, today I can share the wedding invitations that I made for my ex-boss. The design is based on the “Autumn Engagement Card” that I made for her. I scaled the design to 6”x6” and changed the image of the couple.
I made 50 invitations and, because of some of the intricacies, I spent close to 200 hours making them.
From this:
To this:
Here's a close up of the rolled flowers:
The background patterned paper is from Bo Bunny and the plain card is Bazzill.
I used the following Cricut cartridges: Flower Shoppe, Sweethearts, Wedding and Gypsy Font.
I also used a couple of Martha Stewart punches, Distress Ink and a Swiss Dots embossing folder.

Thanks for looking.
Pam xx

Sunday, 27 May 2012

Butterfly Birthday Card

Hi Bloggers,

Today I would like to share a card with you.

The butterfly was cut using a Tim Holtz die and a cereal box.
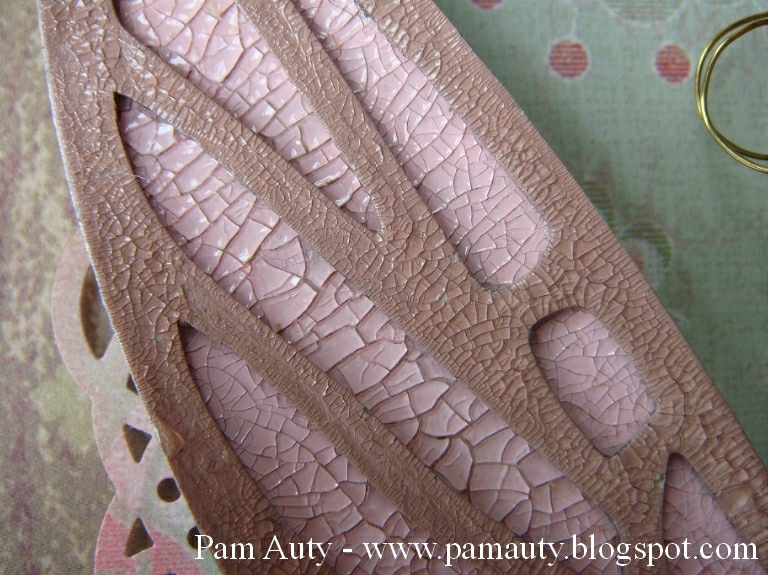
I painted all the pieces with Adirondack paint dabbers and, once dry, I applied a coat of Rock Candy distress crackle paint.
Then I covered the body with tiny accent beads and used some wire for the antennae.

I used a Martha Stewart punch-around-the-page to make the decorative mat.
Hope you like it.
Thanks for stopping by.
Pam xx

Monday, 21 May 2012

Precious Baby Layout

Hi Bloggers,

I made a layout some time ago with a photo of my son when he was a baby. I've been asked several times for the details so I thought I'd share them with you today.
This is the layout:

I used my Cricut Gypsy to design the large scallop circle with holes on each scallop.
I also used my Cricut Gypsy to design the mats for both the title and the photo.
The letters are from the Plantin SchoolBook cartridge and the two plain circles are from the George and Basic Shapes cartridge, cut at 9 1/2" and 5 1/2".

 
The pram was cut at 4 1/2" using an image from the Everyday Paper Dolls cartridge.
The "lace" on the pram was made using a Martha Stewart border punch. I finished off the pram by adding chalk, glitter, a ribbon bow and adhesive pearls.

I applied dark brown ink to just about every edge of card.

Hope you like it.
Thanks for stopping by.
Pam xx