Saturday 12 March 2016

“Walking Dead” Inspired Zombie Birthday Cards

Hi bloggers,

We started watching The Walking Dead recently and have not been able to stop. I think it’s safe to say we’ve become somewhat obsessed!
So I decided to make my husband a Walking Dead inspired card for his birthday.


I wanted the card to look like it had been splattered with blood so I used a combination of Fired Brick Distress Stain and red paint to create the effect.
The zombie is cut with my Cricut and I printed the message onto a mat also cut with my Cricut.
I printed the message for the insert onto another mat cut with my Cricut and splattered it with the Distress Stain and paint..
My son loved the card so much I made a second “Walking Dead” inspired zombie card for him to give.

The window image is cut with my Cricut and I placed some acetate behind the window for added effect.

I also added a zombie hand to the insert.

Hope you like my “Walking Dead” Inspired Zombie Birthday Cards.

Until next time... thanks for stopping by,
Pam xx

Materials
8” x 8” blank cards
Cricut cartridge:
·         A Frightful Affair (zombie cut at 6”, window cut at 5”, hand cut at 1.5”)
·         Art Philosophy – mat cut at 5.5” and 5.75”
·         Pooh Font – letters cut at 1”
Distress Stain
·         Fired Brick
Distress ink
·         Walnut Stain
Patterned paper, plain card, raffia ribbon, acetate, computer and printer

Monday 22 February 2016

Bo Bunny Misc Me Mini Album: Made In Yorkshire

Hi bloggers,

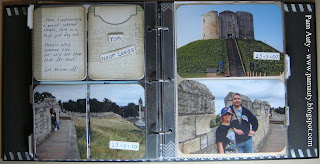
We moved out of our home county of Yorkshire a few years ago and our son is slowly losing his “Yorkshireness” so I made him a fun mini book filled of all things Yorkshire to remind him of his homeland.

There are 6 sections to the book:
·         Yorkshire Phrases
·         Sights & Landmarks
·         Food
·         Places
·         Emotions 
·         You Know You’re from Yorkshire When....

I wanted to make a pocket scrapbooking style album and chose a black Bo Bunny Misc Me 8” x 9”album for this mini book, adding chipboard letters covered in white chalk paint to the front cover along with a white Yorkshire Rose embellishment.
I used a number of stamping and inking techniques throughout the book and have highlighted a few of the pages below.
 
 
These pages (from the section on Yorkshire Phrases) use alphabet stamps in different styles and sizes: some stamped with regular ink and others embossed with silver embossing powder.
I also used the silver embossing powder with kaisercraft “Edges” stamps to create a frame around the pages.

 The following two pages are from the Yorkshire Sights & Landmarks section. I used the same large alphabet stamps and this time embossed with white detail embossing powder.
I cut the shapes for the journaling spots with my Cricut using the Elegant Edges cartridge and accented them with Anna Griffin stamps.

These pages, from the Yorkshire Food section, have journaling in “Yorkshire speak” (something I did throughout the book). I also used the small alphabet stamps again.
I stamped the kaisercraft Crackle stamp on the backgrounds using Walnut Stain ink and added a Picture Wheel behind the large photo mat.
The photo mat is from the Cricut Elegant Edges cartridge and I used some Project Life Cards from the DIY Shop set, cutting a frame from one card and adding it to another.

 These next two pages (from the Yorkshire Places section) were very quick and easy to do with only a little altering to the Project Life cards, using stamps and ink.
I also cut a 6” x 4” photo in half to fit across two of the 3” x 4” pockets.

 The last two pages I want to share are from the You Know You’re from Yorkshire When... section and have “Yorkshire speak” again for the journaling.
I made the journaling cards using a Project Life Card as a template and created a snowy effect background using stamps with white embossing powder

To fit with the pocket scrapbooking style I used a corner punch to round the corners of all the photographs.
Until next time... thanks for stopping by,
Pam xx

Materials (for the whole book)

Album: Bo Bunny Misc Me 8” x 9” plus various pockets
Stamps:
·         Hero Arts – Classic Caps
·         Studio G (by Hampton Art) – alphabet set
·         Hampton Art – Artsy Edges
·         Kaisercraft – Edges, Film Edges, Crackle
·         Crafter’s Companion – Textures Walls and Corners
·         Prima – Brick
·         La Blanche – swirl corner
·         Anna Griffin – swirl stamps
·         Tim Holtz – Urban Tapestry
·         Graphic 45 – Mother Goose set 2
·         Bo Bunny – Write On
·         Making Memories – Journaling Spots
Cricut – Elegant Edges and Art Philosophy cartridges
Tim Holtz Picture Wheel Die
We R Memory Keepers Corner Chomper
Project Life Cards – DIY Shop
Chipboard – letters, Tando house
Chalk paint – white
Magic Mesh, twine, raffia ribbon, black ribbon, acetate, small metal frame and Glossy Accents
Ink – Brilliance Moonlight White, Distress: Black Soot, Pumice Stone, Weathered Wood, Pine Needles, Forest Moss and Walnut Stain
Embossing folder – Crafter’s Companion Dry Stone Wall, Cuttlebug Swirl
Embossing powder – Personal Impressions Silver Dollar, Cosmic Shimmer Detail True White
Distress embossing powder – Shabby Shutters.
 

Saturday 20 February 2016

18th Birthday Card

Hi bloggers,

Today I’d like to share an 8” x 8” card that I made for my son’s 18th birthday (Wow, how did that happen?).

I cut a mat from smooth white card using my Cricut and stamped the image onto it using Memento Tuxedo Black ink. I coloured the stamped image using Promarkers.
I also used my Cricut to cut the letters and numbers and covered them with Glossy Accents.
The stars are from the Tando Creative mini stars set and I coloured them using Black Soot Distress Ink
Until next time... thanks for stopping by,
Pam xx
 
Materials
 
Penny Black stamp – Your Way
Cricut cartridges:
·         Elegant Edges - mat cut at 5.5”
·         Pooh Font Set – letters and numbers using the Marker Creative Feature and Shadow.
Ink:
·         Black Soot Distress Ink
·         Memento Tuxedo Black
Colouring pens - Promarkers
Chipboard stars – Tando Creative mini stars set
Black ribbon
Patterned paper – HOTP
 

Saturday 13 February 2016

Invitation for an Easter Egg Hunt

Hi bloggers,

Today I’d like to share some 6” x 6” invitations I made for an Easter Egg Hunt.
 
I cut the large Easter egg, bunny, grass and tag with my Cricut and highlighted the swirl pattern on the large Easter egg with Walnut Stain Distress Ink.
I added a bow and gem to the bunny and used small alphabet stamps for the text on the tag.
The small Easter eggs were stamped onto patterned paper and I embossed some using gold embossing powder and others using glitter embossing powder. I cut them out and arranged them in a cluster behind the grass
As a finishing touch I added a double bow to the large Easter egg using gold ribbon.
 
The invitation wording is inside the “card” and I embellished the bottom corner with a stamped Easter basket coloured with Promarkers.
Until next time... thanks for stopping by,
Pam xx
 
Materials
 
Cricut Cartridges:
·         Art Philosophy – large Easter egg at 4.75” and insert mat cut at 5.5”
·         Gypsy Wanderings – bunny at 3”
·         Plantin’ Schoolbook – grass at 1.5”
·         Wrap It Up – tag at 1.5”
Stamps:
·         Serendipity Easter set – small Easter eggs and basket
·         Stampin Up! Easter Blossoms set – small Easter egg
·         Studio G – alphabet stamp set
Embossing Folder:
·         Cuttlebug swirls
Embossing Powder:
·         Heat It UP! – gold
·         WOW - St. Tropez Sands
Colouring pens – Promarkers
Ink – Walnut Stain Distress Ink
Patterned paper – DCWV
Gold ribbon, small white ribbon bow, gem
Kraft card blank

Tuesday 22 December 2015

Christmas Bauble Shaker Card

Hi bloggers,

I used my Cricut and the Joys of the Season cartridge for this Christmas bauble shaker card, embossing the top layer of the bauble with the Swiss Dots embossing folder.
 
The snowflake is also cut with my Cricut using the Art Philosophy cartridge and the foliage under the snowflake is the Stamps by Chloe Mini Branches stamp. I heat embossed the design onto acetate using WOW! Frosty the Snowman embossing powder.
The Christmas greeting is from the Kaisercraft Mistletoe clear stamps set and I used Cosmic Shimmer True White embossing powder. 
I filled the shaker with a mixture of Stamps by Chloe Faux Snow, Cosmic Shimmer Iced Snow and Diamond Dust. 
 
 
Thanks for stopping by.
Pam xx


Saturday 19 December 2015

Noel and Deer Christmas Cards

Hi bloggers,

I have two more Christmas cards today that I'd like to share with you.

The background on both of these cards has been embossed using a snowflake embossing folder and I blended ink over the embossed areas to highlight the raised images.

I designed the "Noel" for this first card on my Gypsy, using the Cricut Blackletter cartridge. The frame was also designed on my Gypsy using the Accent essentials and George and Basic Shapes cartridge. The snowflakes were cut on my Cricut using the Christmas cartridge.
For the second card I used my Cricut and the Elegant Edges cartridge to cut the frame . The deer was cut using the Teresa Collins December 25th cartridge.
I used a rubber stamp for the message with black ink and stamped directly onto the background. 
Thanks for stopping by.
Pam xx

Saturday 12 December 2015

Merry Christmas Cards

Hi Bloggers,

The Christmas cards I want to share with you today all have the same “Merry Christmas frame” cut with my Cricut using the Teresa Collins December 25th cartridge.
When I cut the frame at 5" I realised it is a perfect size for many of my stamps. I used Lili of the Valley stamps for these cards and coloured the images using Promarkers, adding a little Frantage embossing powder for the snow effect.
The snowflake is from the Art Philosophy cartridge and the tree is from the Paper Dolls Dress Up cartridge.
 
 
For this card I cut the bird image with my Cricut using the Teresa Collins December 25th cartridge and covered it with Glossy Accents and a little glitter.
Thanks for stopping by.
Pam xx